Cooking the traditional glue
The actual bookbinding process usually starts with making the traditional glue. It is a very simple recipe: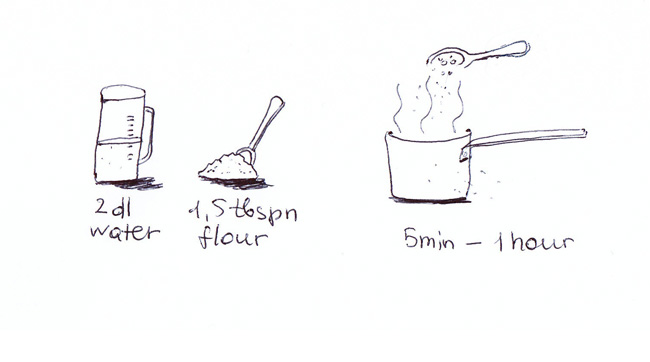
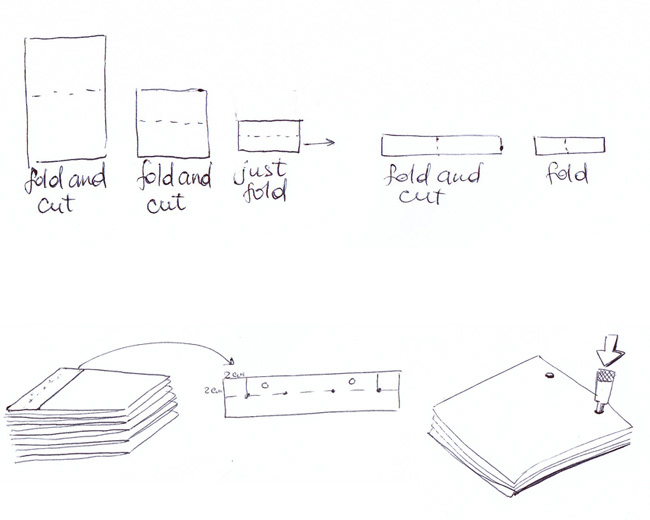
Prep & Fold
The next step is all about prepping the paper. Traditionally we start with a big (around 100×150 cm) piece of rice paper, which you fold in half and cut as illustrated until you have a stack of folded even folds. Then you create a template for the big holes (cut with a special hole cutter) and 4 needle holes. Make sure that your template is aligned on the opposite side from the crease before punching!


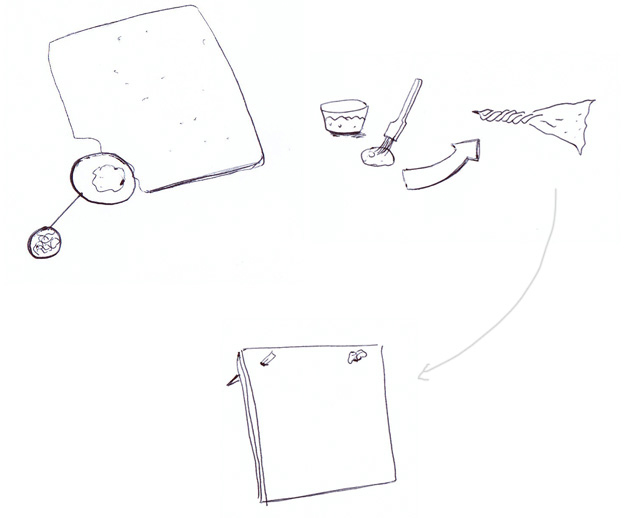
Structure
After the main holes are punched take a small piece of rice paper and soak it in the cooled glue, which we made earlier. Twist the paper and stretch it through the first hole. Then proceed with another paper and fill up the second hole. Make sure that the paper sticks out on both sides of the booklet. Then cut the access paper, leaving approx. 1/5 cm on each side. Use bookbinding bone to spread the paper around the hole, pressing it agains the cover. Let the glue dry.
*Japanese rice paper, unlike any other standard paper, has no unstructured fibers. This makes it very strong, which is why it is often used as the key holding structure to the traditional Japanese booklet.


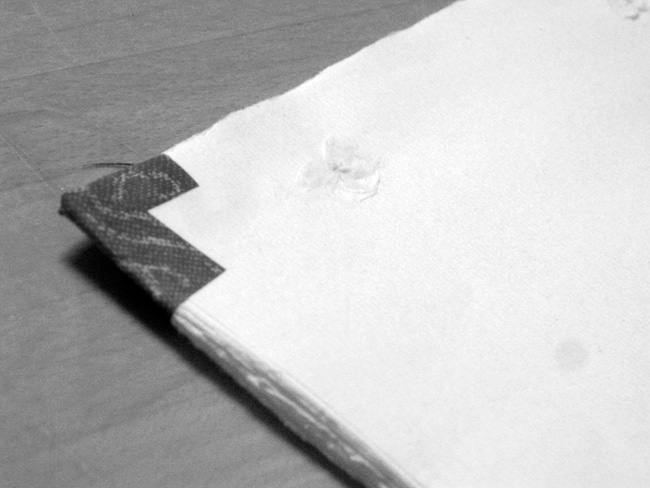
Corners
While the glue/paper structure is drying, let’s make the book corners. Fold and cut the short, approx. 2×1 cm strips of cover paper (usually decorated). Glue the paper first to the top of the corner and then bend it all around as illustrated.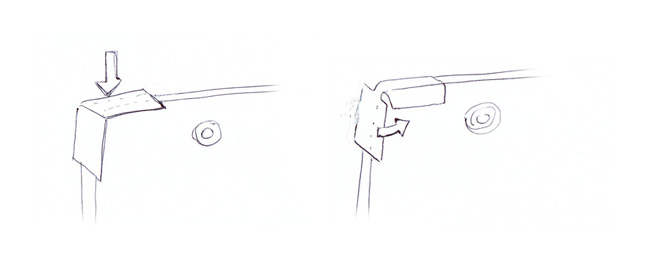
Cover
Cut a generous piece of cover paper. Glue the folded top of the cover first. then cut the 45 degree corners on that side. Then define the folding lines using the paper book as a template. Fold the sides in. Finally, fold and glue the side opposite from the crease to the first page of your booklet.


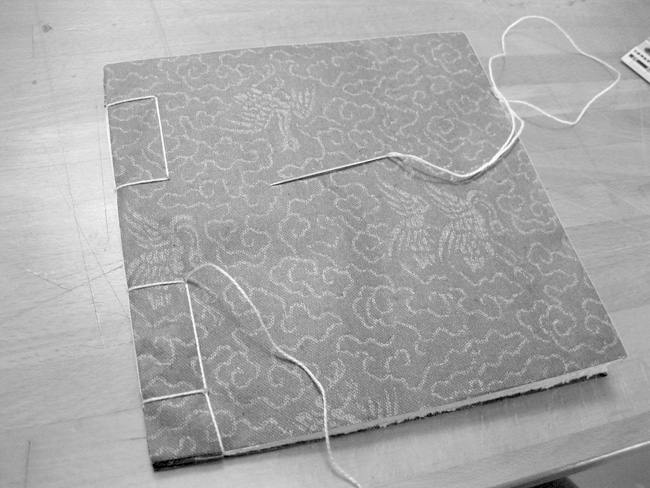
Sewing
Use the same template to punch the rest 4 holes with the needle. Start sewing from the back and center. Leave a little extra string on on the side where you start. Go to one edge first and do the corner circular hoops. Then, work you way back to the other edge, doing an extra hoop through the back. You should come back at the same point where you started.
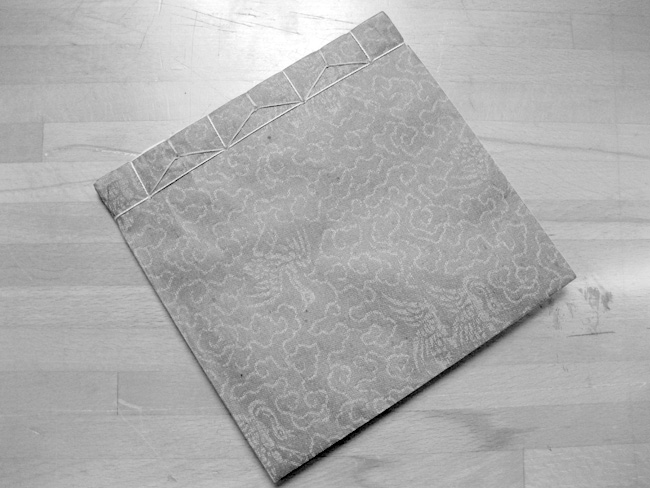
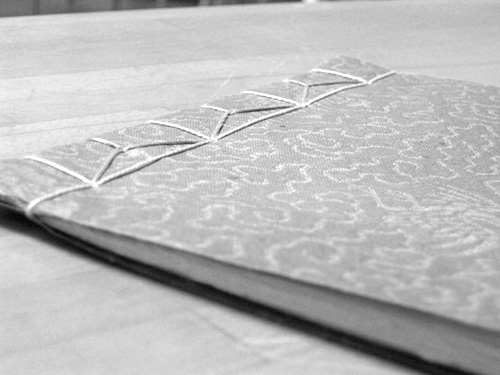
To finish tie of the thread so that the binding does not get loose and thread the needle through the first hole again. Cut the extra thread and apply a little bit of glue on each side. Your simple book is done!